Best HDR Settings for Switch 2 on Your TV
A friendly, step-by-step walkthrough for switching on HDR properly, calibrating it against your telly, and getting titles like Splatoon Raiders looking exactly the way Nintendo intended.
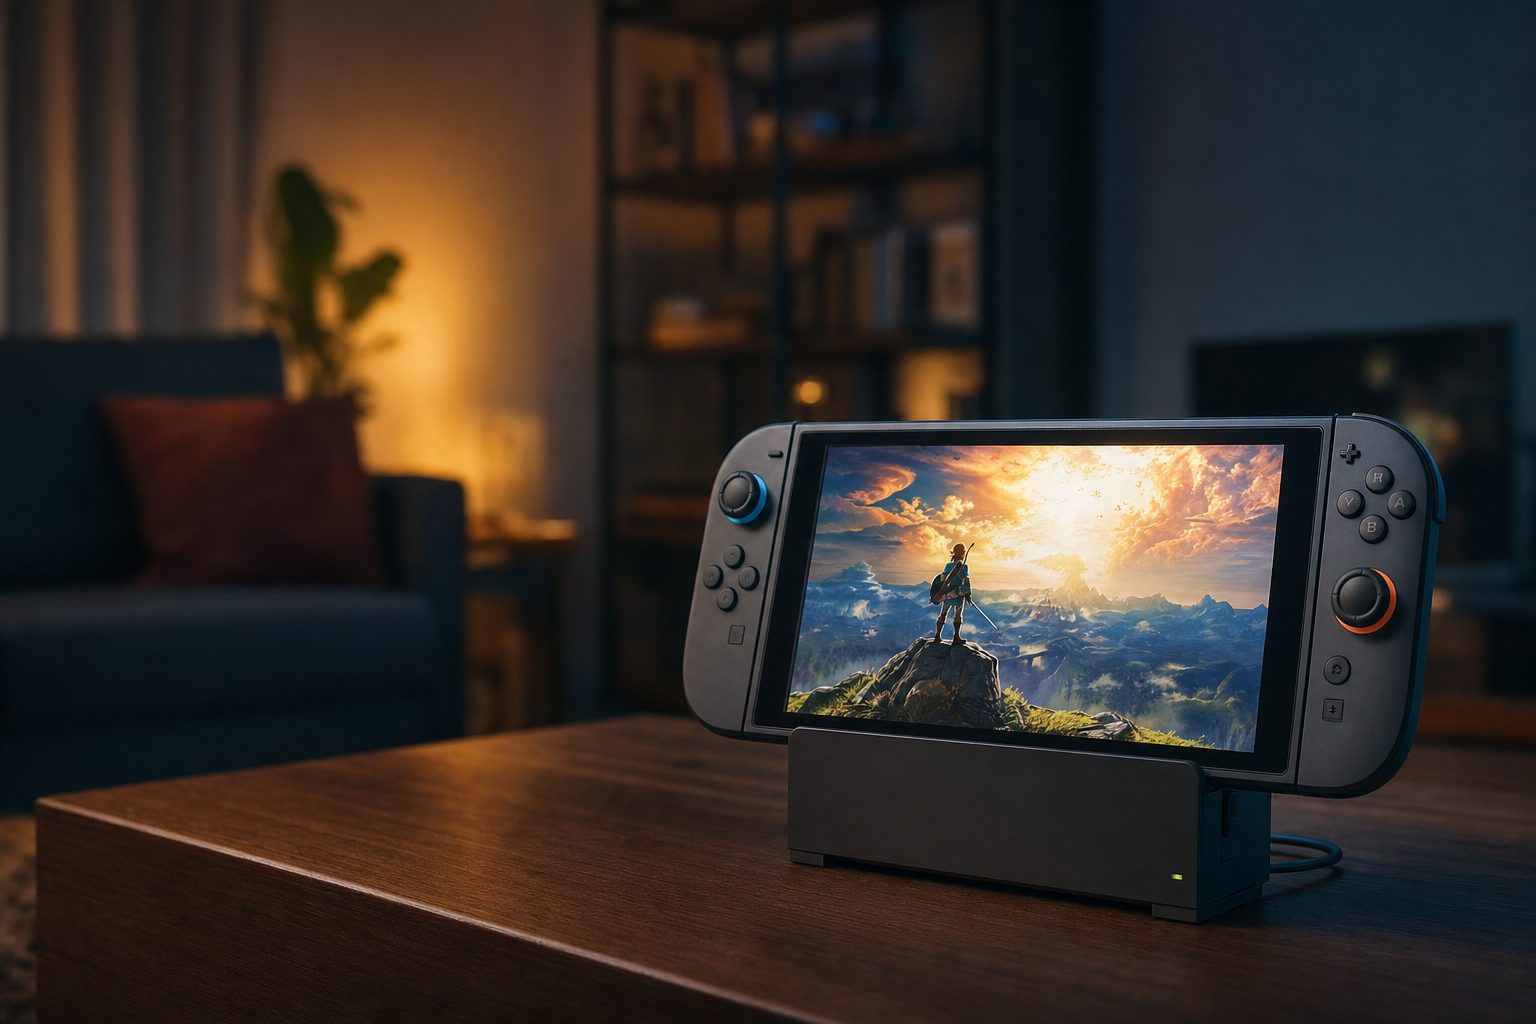
The Switch 2 is the first Nintendo console with proper HDR output — but a few minutes in the settings menu make an enormous difference.
Right, let's have a proper chat about this, because I've had more messages about HDR on the Switch 2 than almost anything else this past year. Someone buys the console, plugs it in, boots up a shiny new game, and finds the picture looks either weirdly washed out or oddly dim — and they're left scratching their heads wondering whether they've been sold a dud. Nine times out of ten, they haven't. It's simply that HDR is switched off, half-configured, or fighting with the TV's own settings.
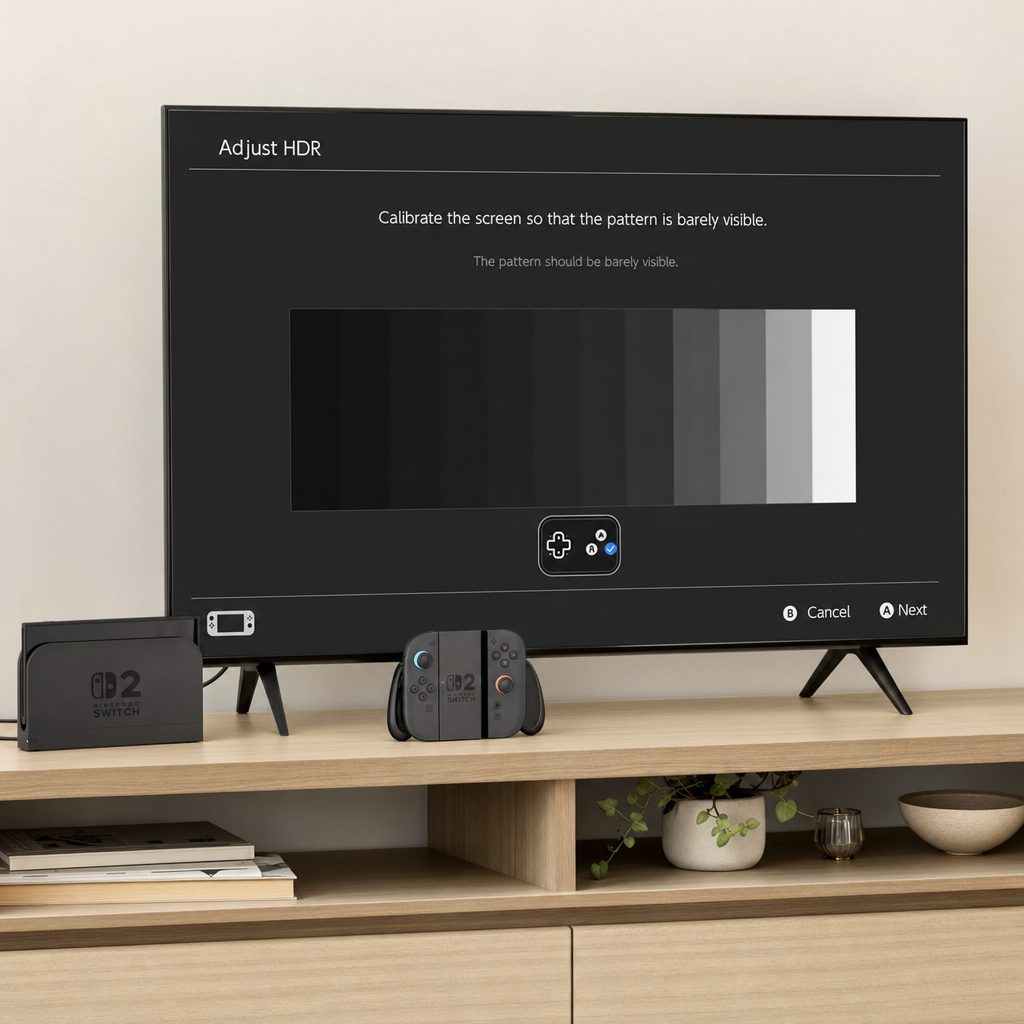
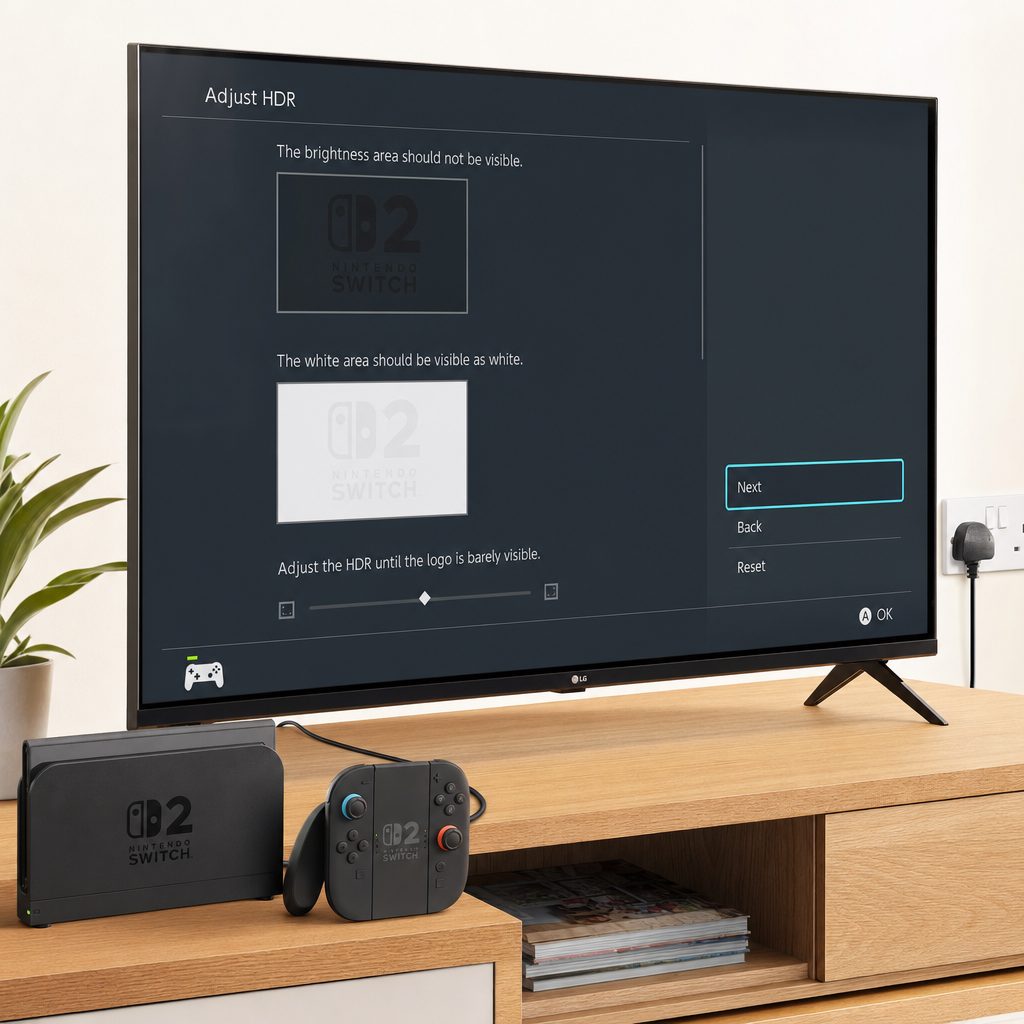
The on-screen calibration test patterns let you match the console's HDR output to exactly what your TV can display — skipping this step is the number one cause of "blown-out" highlights.
The Switch 2 is genuinely a milestone here. It's the first piece of hardware Nintendo has ever launched with support for HDR, and after years of the original Switch outputting a flat, standard-range image, that's a big deal. But — and it's an important but — HDR isn't a magic tick-box that instantly makes everything gorgeous. It needs a little setup, ideally a couple of minutes of on-screen calibration, and an understanding of what your particular telly is doing at the other end of the cable.
So that's what this guide is. No jargon avalanche, no assuming you're a home-cinema obsessive. I'll walk you through enabling it, calibrating it using the console's own tools, tuning your TV to cooperate, and I'll use Splatoon Raiders as our reference throughout because it's one of the cleaner showcases of what the hardware can actually do. Grab a cuppa and let's get your picture sorted.
What HDR Actually Does on the Switch 2
Before we start poking around in menus, it's worth a quick sanity check on what we're even chasing here, because "HDR" gets thrown about like it's one single thing when it really isn't.
HDR — High Dynamic Range — is about the gap between the darkest darks and the brightest brights that a screen can show you at the same time, plus a wider palette of colours in between. On the old Switch, and on any standard-range picture, a bright neon sign and a subtle bit of shadow detail had to share a fairly narrow range. Something had to give. With HDR done properly, that neon sign can genuinely glow whilst the shadows underneath it keep their detail. In a game like Splatoon Raiders, where the whole aesthetic is built around luminous ink splattered across contrasty environments, that's exactly where it earns its keep.
Here's the crucial bit of expectation-setting: HDR on the Switch 2 is a docked-to-television affair. This is about the picture you get when the console is sitting in its dock and pushing an image out to your big screen over HDMI. If your telly supports HDR and you configure both ends sensibly, you get the full effect. If it doesn't, you get a perfectly good standard-range image and there's nothing wrong with that.
The golden rule of HDR: it only ever looks as good as the weakest link in the chain. That means the console setting, the game, the HDMI cable, the input on your TV, and the TV's own picture mode all have to be pulling in the same direction. Get one wrong and the whole thing can look worse than plain old SDR.
Before You Touch Anything: The Checklist
I know the temptation is to dive straight into settings and start flipping switches, but two minutes of prep here saves you a world of "why does this look grey and sad" frustration later. Run through this little checklist first.
Confirm your TV actually does HDR
Check the box, the manual, or the manufacturer's site. Look for "HDR10", "Dolby Vision" or "HDR" on the spec sheet. Many budget sets marketed as "4K" are still standard-range, and that's fine — you just won't be using HDR mode.
Use a good HDMI cable and the right port
The cable that came in the box is fine. Plug it into an HDMI port on the TV that supports HDR — on a lot of tellies not every port is equal, so check the labelling near the sockets.
Enable the "enhanced" HDMI mode on your TV
Many TVs ship with HDMI inputs set to a basic mode that can't carry HDR. It's usually a per-input toggle buried in the TV's menu, called something like "HDMI Deep Colour", "Enhanced", "UHD Colour" or "Input Signal Plus". This one setting trips up more people than anything else.
Update the console software
Make sure your Switch 2 is on the latest system version. HDR handling and calibration behaviour have been refined through updates, and you want the current, most polished version.
Do those four things and you've eliminated the vast majority of "HDR doesn't work" complaints before you've even opened the console's settings. The enhanced-HDMI toggle in particular is the silent villain — a telly that's perfectly capable of HDR will simply refuse to show it if that input is stuck in basic mode.
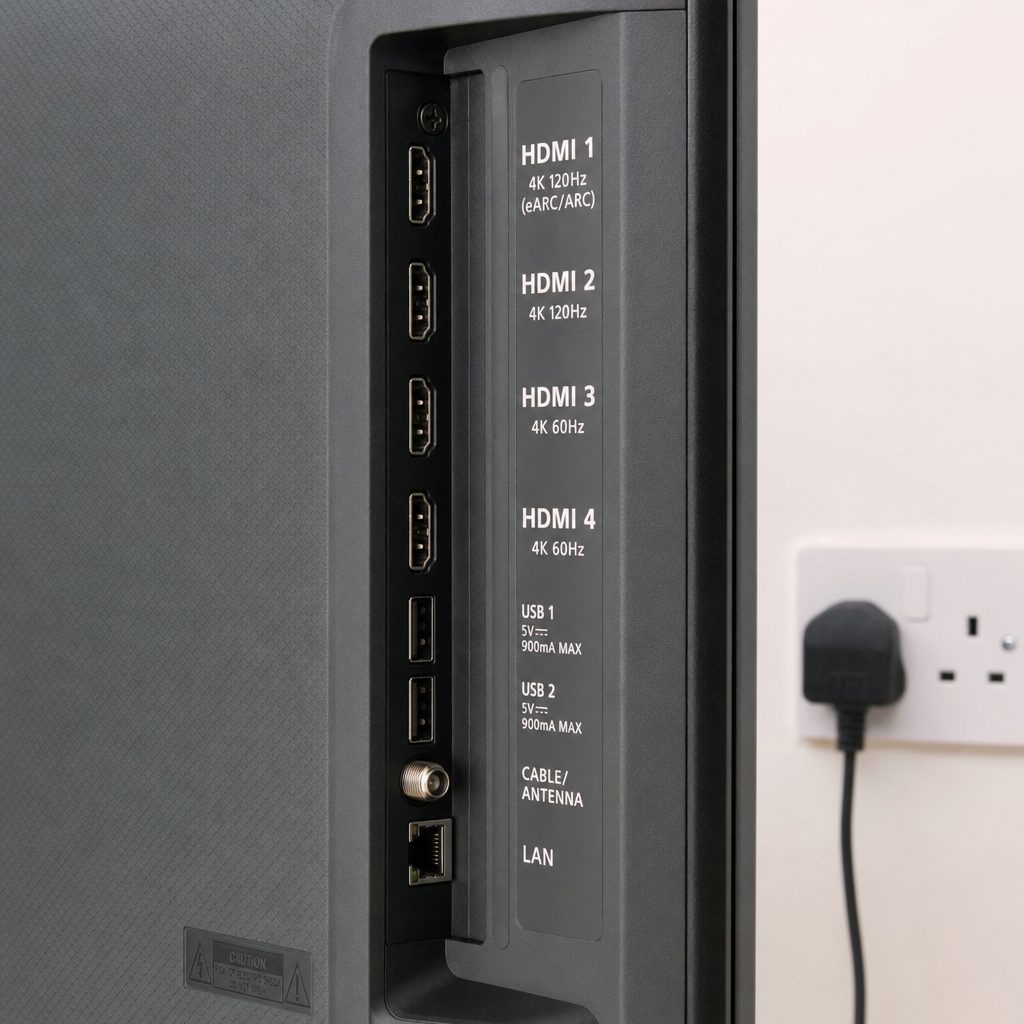
Check the HDMI port labelling on the back of your TV — on many sets only certain inputs carry a full HDR signal.
Step-by-Step: Enabling HDR on the Switch 2
Shop Enabling HDR on the Switch 2 on Amazon UK
Console docked, telly on the right input, enhanced HDMI mode enabled — now we tell the Switch 2 to actually output HDR. It lives in the system settings and it's not hard to find once you know where to look.
1. Dock the console and select the right TV input
Slot the Switch 2 into its dock and connect it to the HDR-capable HDMI port you sorted earlier. On your TV remote, switch to that input. You want the console showing its normal home screen on the big display before you go any further.
2. Open System Settings
From the home menu, head into the System Settings (the cog icon). Scroll down the left-hand column to the display-related section. This is where the console keeps everything to do with how it talks to your TV.
3. Find the HDR output option
Look for the HDR output setting. You'll typically get a choice along the lines of "On", "Off", or an automatic option that only kicks in for content that supports it. The automatic-style option is the one I steer most people towards — it means HDR turns on for HDR games and quietly steps aside for anything that's standard-range, so nothing looks odd in menus or older titles.
4. Let the console confirm compatibility
Once enabled, the Switch 2 checks in with your TV to see what it's capable of. If everything's connected correctly and the input is in enhanced mode, it'll happily switch into HDR. If it can't, it'll usually tell you why — which is your cue to go back and check that enhanced-HDMI toggle.
Pro Tip
If you're not sure whether HDR is genuinely active, boot up Splatoon Raiders — a confirmed HDR title — and watch the brightest ink effects against dark backgrounds. Real HDR gives those highlights a punchy, almost glowing quality that a standard picture simply can't match. If everything looks flat and even, HDR probably isn't actually engaging and it's worth retracing your steps.
The Bit Most People Skip: Calibrating HDR
Here's where the Switch 2 does something genuinely clever, and where most people leave a lot of picture quality on the table by not bothering. The console has a built-in HDR calibration process that lets you match its output to your specific telly — and it matters far more than you'd think.
The reason it matters is that not all HDR TVs are equally bright. A high-end OLED and a mid-range LED-LCD have very different peak brightness capabilities, and if the console assumes your screen can go brighter than it actually can, the brightest highlights get "clipped" — they blow out into a flat white blob and you lose all the detail. Calibrate properly and those highlights roll off gracefully instead, keeping their detail right up to the edge of what your screen can do.
The maximum brightness slider
The calibration screen shows you test patterns and asks you to adjust a value until a symbol is just barely visible — or just barely disappears — against the background. That's you telling the console the ceiling of what your TV can display.
The paper-white / mid-tone reference
Some calibration steps set where "normal" brightness sits — the level a white piece of paper would be. Getting this right keeps the overall image from feeling either too glaring or too gloomy.
Trust your eyes in your actual room
Do the calibration in the lighting you normally game in. A picture tuned in a pitch-black room can feel dull in a sunny living room, and vice versa.
Calibrating against a known display profile
If you'd rather not eyeball it entirely, you're not on your own. HDTVTest published a detailed guide covering how to set up the Switch 2 with a range of displays, translating a lot of the common frustrations into concrete numbers you can dial in for your particular screen. If you own a well-known TV model, it's well worth seeing whether there's a recommended figure for it — it takes the guesswork out and gets you to a properly tuned image faster than trial and error.
That said, don't be intimidated if you can't find exact numbers for your telly. The on-screen calibration is designed to be done by eye, and getting it roughly right by hand is dramatically better than leaving it at a default that assumes a brightness your screen can't reach.
If you ever change TVs — or move the console to a different room with a different set — re-run the calibration. The values that were perfect for one screen can be quite wrong for another, and it only takes a minute to redo.
Tuning Your TV to Meet the Console Halfway
Calibration on the console side is only half the story. Your TV has its own opinions about how to display an HDR signal, and left to its factory defaults, plenty of tellies will meddle with the picture in ways you don't want. Here's how to get the set itself to behave.
Pick the right picture mode
When an HDR signal arrives, most TVs switch into a dedicated HDR picture mode automatically. The trick is choosing a sensible one. Modes labelled "Vivid" or "Dynamic" tend to crank saturation and sharpness to eye-searing levels that look impressive in a showroom and fatiguing at home. Modes labelled "Cinema", "Movie", "Filmmaker", or "Game" are usually far closer to how the content is meant to look. For gaming specifically, a "Game" mode is ideal because it also slashes input lag.
Turn on Game Mode for responsiveness
Speaking of which — always enable your TV's Game Mode for the Switch 2's input. Fancy image processing adds delay between you pressing a button and seeing the result on screen, which matters enormously in something as twitchy as Splatoon Raiders. Game Mode strips that processing back so the game feels sharp and immediate.
Look for HGIG if your TV has it
Higher-end sets — a lot of LG and Samsung OLEDs among them — offer an "HGIG" setting. In plain terms, HGIG tells the TV to not apply its own dynamic tone-mapping and instead trust the calibration you've already done on the console. When you've properly calibrated the Switch 2 to your screen, HGIG is usually the mode you want, because it keeps everything consistent and avoids the TV second-guessing the console. If your telly doesn't have HGIG, don't fret — the console calibration still does its job, you just let the TV's own tone-mapping handle the top end.
Leave the extras switched off
Turn off motion smoothing (the "soap opera effect"), aggressive noise reduction, and any "dynamic contrast" gimmick when gaming. These features fight against a carefully calibrated HDR image and can introduce artefacts. A clean, honest picture beats a heavily "enhanced" one every time.
Pro Tip
Set your console-side HDR calibration first, then choose HGIG (or Game mode) on the TV. Doing it in that order means the TV respects the ceiling you've already established, rather than the two systems both trying to manage highlights and cancelling each other out.
Using Splatoon Raiders as Your Reference
I keep coming back to Splatoon Raiders for a reason: it's a confirmed HDR title and its art style makes calibration problems obvious in a way that a muted, realistic game might hide. If you want a quick "is my setup actually right?" test, this is the game to boot up.
Watch the brightest ink
Splatter-heavy scenes throw luminous colour across the screen. With HDR working, the brightest hits should feel like they genuinely light up. If they instead look like a flat, textureless white or overblown blob, your maximum brightness is set too high and you're clipping — lower it.
Check the shadows and dark corners
Look into the darker areas of a level. You want to still make out detail rather than a crushed black void. If shadows are swallowing detail, your setup may be leaning too dark — nudge your mid-tone/paper-white reference up a touch.
Judge the colours
HDR should give you richer, more saturated ink without it looking radioactive. If everything's screaming neon and hurting your eyes, your TV is probably in a "Vivid" mode — switch to a more faithful picture mode.
The lovely thing about using a game like this is that you don't need any special test equipment. Your eyes, a few minutes in a splatter-filled level, and a willingness to nudge the sliders will get you a picture that looks properly dialled in. Once Splatoon Raiders looks right, most other HDR content on the console will fall into line too.
HDR vs SDR on the Switch 2: What Actually Changes
It's fair to ask whether all this fiddling is worth it, or whether HDR is just a marketing buzzword. So here's an honest side-by-side of what genuinely differs between a properly configured HDR image and the standard-range picture the old Switch always gave you.
| Aspect | Switch 2 with HDR (calibrated) | Standard SDR output |
|---|---|---|
| Highlight brightness | Bright elements can genuinely stand out and glow | Bright and mid-tones share a narrower range |
| Shadow detail | Retains detail in dark areas alongside bright ones | More of a trade-off between light and dark |
| Colour range | Wider palette, richer without looking artificial | Perfectly pleasant but more limited |
| Setup effort | Needs enabling, calibration and TV cooperation | Essentially plug-and-play |
| TV requirement | Needs an HDR-capable telly on the right input | Works on any HDMI TV |
| Best showcase | Contrasty, colourful titles like Splatoon Raiders | Everything looks consistent and fine |
My honest take? On a capable telly, properly set up, HDR is a real and noticeable upgrade — the console being Nintendo's first with HDR support genuinely matters. But it's an upgrade you have to earn with a few minutes of setup. Leave it half-configured and you can actually end up with a worse image than plain SDR, which is exactly why so many people initially feel underwhelmed.
The upsides
- First proper HDR from Nintendo hardware — a real generational step up
- Built-in calibration tailors output to your exact screen
- Colourful first-party titles like Splatoon Raiders show it off beautifully
- Automatic-style mode means HDR only kicks in when it should
- Works with HGIG on higher-end TVs for a consistent result
The catches
- Only relevant when docked to an HDR-capable TV
- Skipping calibration can leave highlights blown out
- The enhanced-HDMI toggle trips a lot of people up
- Cheap "4K" TVs marketed vaguely may not truly do HDR
- Needs the TV set correctly too — it's a two-ended job
How Much Difference Does It Really Make?
Numbers on a page never quite capture a picture you have to see, but here's my rough sense of how much each part of the process contributes to the final result. Think of these as "impact on getting a great image", not hardware benchmarks — they're my way of showing where your effort pays off most.
What this really tells you is that the two big wins are almost free: turning HDR on, and making sure your TV's input is in enhanced mode. Do only those two things and you're most of the way there. The calibration then takes you from "working" to "genuinely lovely", and the TV-side tweaks are the polish on top.
Thinking of picking up the Switch 2 or an HDR game to try this out?
Check the latest price and any current bundles on Amazon.Which Setup Suits You Best?
Not everyone's in the same boat, so here's a quick scan-friendly breakdown of the sensible approach depending on your kit and how fussy you are about picture quality.
The OLED owner
You've got the ideal screen for this. Calibrate on the console, switch on HGIG and Game Mode, and Splatoon Raiders will look spectacular. You'll see the biggest benefit of anyone.
The mid-range LED owner
HDR still helps, but your peak brightness is lower — so calibration matters even more to avoid clipping. Set the maximum brightness honestly and enjoy the wider colours.
The competitive player
Prioritise Game Mode and low input lag above all. Keep HDR on if your set handles it well in Game Mode, but never let picture polish cost you responsiveness.
The plug-and-play type
If fiddling isn't your thing, use the automatic HDR option and a "Game" or "Cinema" picture mode, and leave it. You'll still get a good chunk of the benefit with minimal effort.
Common Problems and Quick Fixes
If something's not right, it's almost always one of a handful of usual suspects. Here's my troubleshooting run-through in the order I'd check things.
The picture looks washed out or grey
Classic sign that HDR is enabled on the console but the TV isn't handling it. Check the enhanced-HDMI toggle for that input, and make sure the TV has actually switched into an HDR picture mode.
Bright areas are blown out and detail-free
Your maximum brightness in the console calibration is set higher than your screen can manage. Re-run calibration and set it more conservatively.
The whole image feels too dark or dull
Either your paper-white/mid-tone reference is set too low, or you calibrated in a much darker room than you're now playing in. Redo it in your usual lighting.
Games feel laggy or unresponsive
Turn on your TV's Game Mode for that input. Fancy image processing is adding delay between your inputs and the screen.
HDR won't turn on at all
Confirm the TV genuinely supports HDR, that you're on an HDR-capable HDMI port, and that the input's enhanced mode is on. Update the console software too, in case you're on an older version.
My Overall Verdict on Switch 2 HDR
The rating reflects exactly the story I've told throughout: the potential here is excellent and the built-in calibration is a genuinely thoughtful touch, but the setup isn't quite foolproof enough to be a pure tick-box for everyone. The reward for a few minutes of effort is real, though.
A few minutes of calibration transforms the Switch 2's HDR from "why does this look off?" into a picture that genuinely does the games justice.
Frequently Asked Questions
The Bottom Line
The Switch 2 being Nintendo's first HDR-capable console is a proper milestone, and when it's set up correctly the difference is well worth having — especially on colourful, contrasty first-party titles like Splatoon Raiders, which practically glow with the right configuration.
The catch is that it's a two-ended job. Enable HDR on the console, make sure your TV's HDMI input is in its enhanced mode, run the built-in calibration honestly for your screen, and set the telly to a faithful picture mode with Game Mode on. Add HGIG if your set offers it. Miss any one of those and you can end up disappointed — nail them all and you'll wonder how you ever put up with the flat old picture.
My advice? Don't skip the calibration. It's the single step that separates "HDR is on" from "HDR looks fantastic", and it costs you nothing but a couple of minutes with a few test patterns. Do it once, do it properly, and enjoy the results.